Unlocking the Secret to Tender, Delicious Oven Baked Ribs
Imagine sinking your teeth into a rack of ribs so tender, the meat practically melts off the bone. Picture that rich, smoky-sweet flavor bursting in your mouth, leaving you reaching for another, and another. For many, this culinary fantasy is reserved for pricey restaurant meals or the domain of experienced pitmasters with their elaborate smokers. But what if we told you that achieving perfectly fall-off-the-bone oven baked ribs is not only possible but surprisingly simple, right in your own kitchen?
Forget the intimidating equipment or the need for an all-day smoking session. This comprehensive guide will equip you with the knowledge and confidence to create mouthwatering restaurant-quality oven ribs without a smoker or high cost. We're talking about a foolproof method that consistently delivers ribs so tender and flavorful, they'll become a staple in your home cooking repertoire. Get ready to impress your family and friends with ribs that taste like they came straight from a championship BBQ joint, all thanks to the humble oven.
Why Oven Baked Ribs Are Your New Favorite Way to Cook Them
The allure of perfectly cooked ribs is undeniable, but the traditional methods often present barriers for the home cook. This is where the oven truly shines, offering an accessible and incredibly effective alternative that eliminates common hurdles:
- Unrivaled Tenderness: The slow-roasting process in the oven creates an incredibly moist and forgiving environment. Wrapped tightly, the ribs essentially steam in their own juices, breaking down tough connective tissues and resulting in meat that is incredibly tender and succulent every single time.
- Effortless Preparation: Unlike constant monitoring required for grilling or smoking, oven baked ribs demand minimal active time. After a quick prep, you simply let your oven do the heavy lifting, freeing you up to focus on sides or simply relax.
- Year-Round Enjoyment: Rain, snow, or shine, your oven is always ready. This method ensures you can enjoy delicious BBQ ribs no matter the weather, bringing that summer cookout feeling to any season.
- Cost-Effective: Ordering ribs at a restaurant can be a significant expense. Making them at home drastically cuts down on costs, allowing you to enjoy a premium meal without breaking the bank. Plus, you control the quality of ingredients.
- No Special Equipment Needed: Forget the expensive smokers, propane tanks, or charcoal. All you need is a standard oven with a broiler, a sheet pan, and heavy-duty aluminum foil. It's simplicity redefined.
These advantages make oven baked ribs not just an alternative, but often the preferred method for achieving consistently delicious results with minimal fuss.
The Essential Ingredients for Irresistible Ribs
While the cooking method is crucial, the foundation of exceptional ribs truly begins with thoughtfully selected ingredients. Each component plays a vital role in building layers of flavor and ensuring that signature tenderness.
Selecting Your Ribs
For this foolproof method, we generally recommend Baby Back Ribs (also known as pork back ribs). They are renowned for their lean meat, tenderness, and quicker cooking time, making them a fantastic choice for oven baking. An average slab weighs around 2.5 lbs. While Baby Backs are often worth the slightly higher cost for their superior tenderness, you can certainly adapt this recipe for Spare Ribs. Just note that spare ribs have more meat, fat, and connective tissue, so they may require a longer cooking time to reach the desired fall-off-the-bone texture.
Crafting the Perfect Dry Rub
A homemade dry rub is the soul of your ribs, infusing them with a complex tapestry of flavors. Our recommended blend strikes a balance between sweet, savory, and a hint of spice:
- Brown Sugar (Light or Dark): This is key for sweetness, creating a beautiful crust, and aiding in caramelization during the broiling phase.
- Kosher Salt: Essential for seasoning the meat from within and enhancing all other flavors.
- Ground Black Pepper: Adds a classic aromatic spice.
- Onion Powder: Contributes a savory, umami depth.
- Paprika (Smoked or Sweet): Provides vibrant color and a mild, earthy, or subtly smoky flavor.
- Ground Dry Mustard: Don't skip this! It adds a tangy, slightly pungent note that complements pork wonderfully and helps tenderize the meat.
- Cayenne Pepper (Optional): For those who love a bit of a kick, cayenne will make all the other flavors "pop." Adjust to your spice preference.
Combine these ingredients well, and you'll have a flavor powerhouse ready to transform your ribs.
The Magic of the Mustard Binder
Before applying the dry rub, a thin layer of regular yellow mustard might seem unconventional, but it's a secret weapon. Don't worry, your ribs won't taste like mustard! Here's why it's so effective:
- Adhesion: It creates a slightly tacky surface, helping the dry rub adhere evenly and completely to the meat.
- Flavor Amplification: The vinegar in the mustard works to tenderize the meat further and subtly amplifies the flavors of the rub.
- Moisture: It adds another layer of moisture that helps keep the ribs succulent during the slow roast.
Finishing with Your Favorite BBQ Sauce
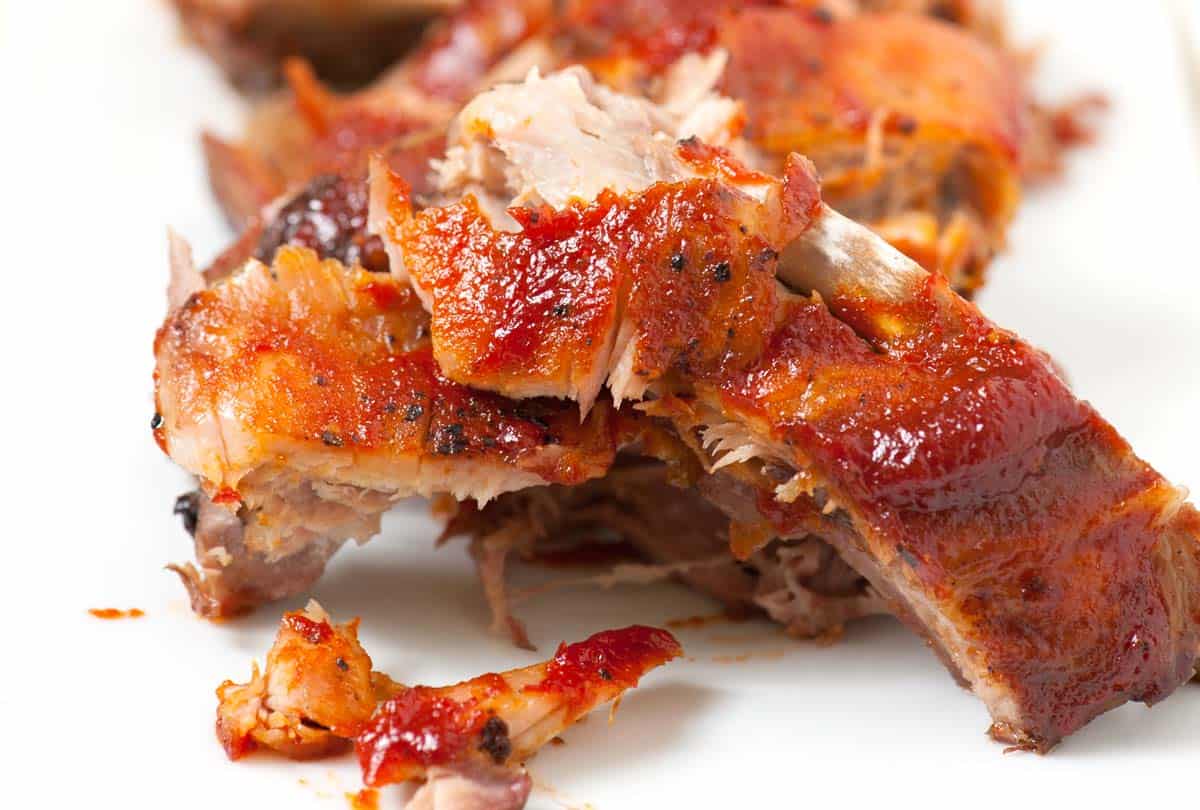
The BBQ sauce is applied towards the very end, during the quick broiling phase. Whether you choose a store-bought favorite or a homemade concoction, the sugars in the sauce will caramelize under the broiler, creating that desirable sticky, slightly charred, and incredibly flavorful crust that defines exceptional ribs.
The Foolproof Method: Step-by-Step to Perfection
This simple, yet highly effective process ensures your oven baked ribs come out tender, juicy, and bursting with flavor every single time.
- Preheat Your Oven: Start by preheating your oven to 300°F (150°C). This temperature is ideal for slow-roasting, allowing the ribs to become incredibly tender without drying out, and without requiring an excessively long cooking time at lower temperatures.
- Prepare the Ribs: This crucial step is often overlooked! On the underside (bony side) of the rib rack, there's a thin, silverskin-like membrane. Removing it prevents the ribs from becoming tough or chewy and allows the rub to penetrate deeper. To remove, simply slide a butter knife or a small spoon under the edge of the membrane at one end of the rack. Once you have a grip, use a paper towel to hold it firmly and peel it away. It usually comes off in one go.
- Apply the Binder and Rub: Pat the ribs dry with paper towels. Spread a thin, even layer of yellow mustard all over both sides of the ribs. This acts as our binder. Then, generously sprinkle your homemade dry rub over the mustard, pressing it gently to ensure it adheres well.
- Wrap Them Tight: Place the seasoned ribs on a large sheet pan. Crucially, wrap them very tightly in heavy-duty aluminum foil. You might need two layers to ensure a complete, airtight seal. This tight wrapping is vital for trapping moisture and creating that steamy environment that tenderizes the meat during slow roasting.
- Slow Roast to Tenderness: Place the wrapped ribs in your preheated oven. For a slab of baby back ribs (approx. 2.5 lbs), roast for about 2.5 to 3 hours. For larger or meatier racks, you might need an additional 30-60 minutes. The ribs are ready when the meat has pulled back from the ends of the bones, and they are incredibly tender when gently prodded.
- The Broiler Finish: Once tender, carefully remove the ribs from the oven and unwrap the foil. Drain off any accumulated liquid (save it for a sauce if you like!). Crank your oven to the broil setting. Brush your favorite BBQ sauce generously over the top of the ribs. Place the sauced ribs back under the broiler for 5-10 minutes, keeping a very close eye on them. You're looking for that perfect caramelization and a slight char on the sauce, not burnt ribs!
- Rest and Serve: Once removed from the broiler, let the ribs rest for 5-10 minutes before slicing. This allows the juices to redistribute, ensuring maximum flavor and tenderness. Slice between the bones and serve immediately.
Expert Tips for Unforgettable Oven Baked Ribs
While the method is straightforward, a few expert insights can elevate your ribs from great to absolutely unforgettable.
- Don't Rush the Membrane Removal: We cannot stress this enough. A properly removed membrane is a non-negotiable step for truly tender ribs. If it rips, just get under another section and continue peeling.
- Choose Heavy-Duty Foil: Regular aluminum foil can tear, leading to steam escaping and dryer ribs. Invest in heavy-duty foil or use two layers for optimal results.
- Adjust Cooking Time, Not Temperature: Resist the urge to increase the oven temperature to speed things up. Slow and low is the key to tenderness. If your ribs aren't as tender as you like after the recommended time, simply put them back in the oven, tightly wrapped, for another 30 minutes.
- Experiment with Rubs and Sauces: While our rub is fantastic, don't hesitate to customize it. Add a touch of chili powder, smoked paprika, or garlic powder. Similarly, explore different BBQ sauces – spicy, sweet, tangy, or smoky – to find your perfect match.
- Consider a Rack for Even Cooking: While not strictly necessary, placing the ribs on a wire rack set inside your sheet pan can help with more even cooking and prevent the bottom from sitting in rendered fat.
- Make Ahead Option: You can slow roast the ribs, let them cool, and refrigerate them (still wrapped in foil) for a day or two. When ready to serve, simply unwrap, sauce, and finish under the broiler until heated through and caramelized.
Conclusion
Gone are the days of believing that tender, juicy, and delicious ribs are an exclusive treat from a specialized BBQ joint or require a hefty investment in smoking equipment. With this foolproof oven baked ribs recipe, you hold the key to creating restaurant-quality BBQ right in your own kitchen, effortlessly and affordably. By understanding the importance of proper preparation, the magic of a flavorful dry rub, and the simple elegance of slow-roasting, you're not just cooking ribs – you're mastering an art. So, preheat that oven, get ready to get a little messy, and prepare to indulge in the best ribs you've ever made. Your taste buds will thank you!
